If you are learning how to draft or alter a pattern and experience FIT ISSUES, your first step should be to verify that you have taken accurate measurements.
If you fail to take accurate measurements you will have FIT PROBLEMS with your slopers, patterns, and finished designs – GUARANTEED!
First, let me share THREE BASIC FACTS OF PATTERN DRAFTING with you.
1. To measure the body accurately for drafting or altering a pattern, you ABSOLUTELY MUST, know WHAT to measure and WHERE the measurements are to BEGIN and END [point to point].
2. If you are inconsistent or sloppy when taking your measurements you will have inconsistent or sloppy results – sad but true. . .
3. Learning to take accurate measurements is a SKILL that you can develop through skillful, deliberate, and consistent practice – kind of like learning to play the piano.
So, today, we’re going to master the skill of TAKING ACCURATE BODICE MEASUREMENTS!
GETTING STARTED
Okay, before we get started, you will need:
1. To wear tight-fitting clothes, a body suit, or a leotard – no loose clothing
2. A good measuring tape
3. An extra pair of hands to help take the measurements, and
4. A worksheet to record your measurements


TORSO MEASUREMENTS
We begin with the Torso Measurements. When referring to the “torso measurements” in pattern drafting, we are referring to measurements “around” the torso.
The “torso” is simply the “trunk” of the body, meaning it is the body without attachments such as the arms, legs, and head.
Record the measurements on the worksheets as you take them.
We’re taking “Upper Torso Measurements” for the bodice – measurements from the waist up.
TORSO CIRCUMFERENCE MEASUREMENTS

11. WAIST ARC – Measure from the center front waist to
the side waist
12. DART PLACEMENT – Measure from the center front waist to the side front along the waist at the “princess seam line.” [To establish the “princess seam line” divide the waist arc by 2 and subtract .25-inches, then measure this distance from the center front waist, along the waistline towards the side front]

17. WAIST ARC – Measure from the center back waist to the side waist
18. DART PLACEMENT – Measure from the center front waist to the side front along the waist at the “princess seam line.” [To establish the “princess seam line” divide the waist arc by
2 and subtract .25-inches, then measure this distance from the center back waist, along the waistline towards the side back]

PRINCESS SEAM LINES
I mentioned “Princess Seam Lines” for the dart placement measurements.
Princess Seam Lines refer to 2 vertical seams placed between the bodice’s side and center back seams and the center front line.
The Princess Seam Lines replace the darts for a closer-fitting bodice. There are two common types of Princess Seams:
1. Shoulder Princess Seam – starts from the shoulder’s center curving down to the waist, and
2. Mid-Armhole Princess Seam – starts from the mid-armhole curving down to the waist.


UPPER TORSO HORIZONTAL MEASUREMENTS | FRONT
When taking “HORIZONTAL” measurements, we are measuring from right to left or left to right.
6. ACROSS SHOULDER – Measure from shoulder tip to the
center front neck – hollow point at the neck
7. BUST ARC – Measure from the center front, over the bust,
ending 2-inches below the armpit
8. BUST SPAN – Place the tape across the bust points, divide
the amount in half for this measurement
9. SHOULDER LENGTH – Measure from the shoulder tip to
the shoulder/neck
10. ACROSS CHEST – Measure from the center front to 1-inch
above mid-armhole

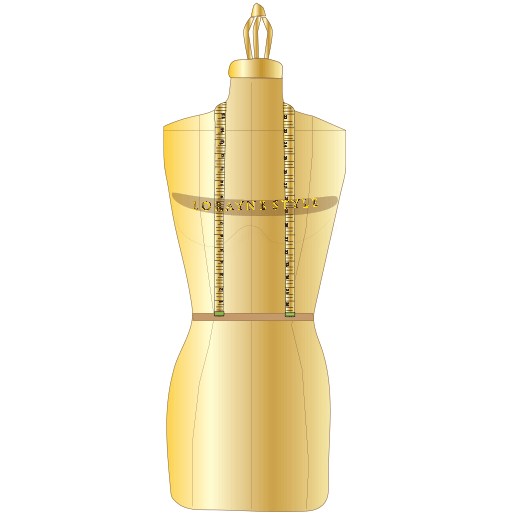
UPPER TORSO HORIZONTAL MEASUREMENTS | BACK
13. BACK NECK – Measure from the center back neck joint to the shoulder/neck
14. ACROSS SHOULDER – Measure from the shoulder tip to the center back neck
15. ACROSS BACK – Measure from the center back to 1-inch above mid-armhole
16. BACK ARC – Measure from the center back to the bottom of the armpit

TORSO ARCS
Okay, so I’ve mentioned “ARCS” a couple of times and by now you might be wondering “What the heck does bust arc, back-arc, waist arc, high-hip arc, and hip arc mean?
We measured the “UPPER TORSO CORCUMFERENCE” in the first step, taking the measurements around the torso.
An “ARC” is part of the circumference of a circle, cut in half by the diameter, which cuts through the center of the circle giving us a front and back torso, then cut the front and back torso in half for a “quarter section.”
So, when we refer to bust arc, back-arc, waist arc, high-hip arc, and hip arc, it simply means that we will be measuring a “QUARTER SECTION” of the circumference [diameter] of the torso, meaning we only measure from the center front or center back to the side of the front or back of the body.

UPPER TORSO VERTICAL | SIDE
When taking “VERTICAL” measurements, we are measuring up and down or down and up.
19. BUST DEPTH – Measure from the shoulder tip to the bust point
20. BUST RADIUS – Measure from the bust point around the bust mound, ending at the rib below
21. SIDE LENGTH – Measure from 1/2 – 1-inch below the armpit to the side waist
UPPER TORSO VERTICAL MEASUREMENTS | FRONT
22. FULL LENGTH – Measure from the shoulder/neck to the waist, parallel with the center front line
23. MID-ARMHOLE – Measure from the shoulder tip down to the center of the armpit, then divide that number in half
24. CENTER LENGTH – Measure from the hollow of the neck down to the waist, over the bust

UPPER TORSO VERTICAL MEASUREMENTS | BACK
27. FULL LENGTH – Measure from the shoulder/neck to the
waist, parallel with the center back line
28. MID-ARMHOLE – Measure from the shoulder tip down to
the bottom of the armpit, then divide that number in half
29. CENTER LENGTH – Measure from the neck joint down to
the waist
30. SHOULDER SLOPE – Measure from the shoulder tip down
to the center front waist [measure the right and left sides,
if measurements differ by more than 1/8-inch, the
shoulders are asymmetric, and you would draft the pattern
differently]

25. NEW STRAP – Measure from the shoulder/neck to the
bottom of the waist at the side seam, to the side of the
bust mound, not over it.
26. SHOULDER SLOPE – Measure from the shoulder tip down
to the center front waist [measure the right and left sides,
if measurements differ by more than 1/8-inch, the
shoulders are asymmetric, and you would draft the pattern
differently]

ARMHOLE DEPTH
Accurately drafting armholes and sleeves can be problematic.
Problems such as the armholes being so tight that you can’t rotate your arm, or you might have a gaping space at the front or back of the mid-armhole area, or sometimes the fabric bunching up under the armhole.
Sleeve caps may be too high or too low, causing fit problems.
Accurately measuring the armhole and arm will eliminate most fit problems you have with the armhole and allow the garment to fit comfortably against the body.
For this lesson, we will only measure the front and back “ARMHOLE DEPTH.” The arm measurements are covered in detail in Series 3 – “HOW TO TAKE ACCURATE ARM MEASUREMENTS.”

WHAT IS MEANT BY ASYMMETRIC SHOULDERS?
Sometimes our bodies are asymmetrical – meaning one side of the body differs slightly from the opposite side of the body.
Asymmetric shoulders occur when one shoulder slope is 1/8-inch higher or lower than the opposite shoulder slope, which is why we measure BOTH the right and left shoulder slopes, front and back.
If your shoulders are asymmetric, your pattern draft or commercial pattern will need to be adjusted accordingly.
31. ARMHOLE DEPTH – Measure the front and back armhole depth from the shoulder tip to 1/2 – 1-inch below the bottom of the armpit at the side seam.
NOTE: Armhole depth should not be too high or too low because it would pull the sleeve up into the armpit or make the armhole drop too low. Test fit with the sleeves attached, and make adjustments.

Okay, now that you know how to take accurate bodice measurements – it’s back to the drawing board. First, be sure you use a good tape measure, wear tight-fitting clothes or a leotard, and have someone assist you.
Record your measurements on the WORKHEETS that are included in my eBOOK – PATTERN DRAFTING FOR WOMEN | HOW TO TAKE ACCURATE BODICE MEASUREMENTS.”
Get in the habit of checking your measurements a couple of times a year to update your worksheets, for body changes due to weight gain or loss and gravity shifts.
Once you’ve mastered the skill of taking accurate “BODICE” measurements, you’re ready to draft your “BASIC BODICE SLOPER” – BTW this process is known as “FLAT PATTERNMAKING.”
You can also view the YouTube video at: CLICK HERE. . .
Get your FREE eBook by subscribing to my newsletter: “DESIGN, DRAFT, SEW, & GO!” Click the SUBSCRIBE button, below. . .

UP NEXT – HOW TO TAKE ACCURATE SKIRT MEASUREMENTS
If you are experiencing difficulty getting your Skirt slopers to fit properly, don’t miss PART 2 of this 4-PART SERIES “HOW TO TAKE ACCURATE SKIRT MEASUREMENTS.” CLICK HERE. . .
